There's a universally beloved treat that transcends seasons, but truly shines brightest around Easter: the humble yet magnificent Reese's Peanut Butter Egg. Its unique, melt-in-your-mouth peanut butter filling enveloped in a delicate chocolate shell sparks joy in countless hearts. But what if you didn't have to wait for seasonal releases? What if you could capture that iconic flavor, tailor it to your family's tastes, and create lasting memories in the kitchen, especially with little helpers? Get ready to discover the magic of making the best Easy Homemade Reese's Eggs: Your Perfect Easter Treat, a copycat recipe so good, it might just replace your store-bought favorites!
Why Homemade Reese's Eggs are the Ultimate Family Treat
For many, the mention of Reese's Eggs evokes instant nostalgia and a craving for that perfect sweet and salty combination. While the commercial version is undeniably delicious, crafting your own Delicious Gluten-Free Homemade Reese's Eggs for Any Time of Year at home offers a multitude of benefits that extend beyond mere taste.
The Magic of Peanut Butter and Chocolate
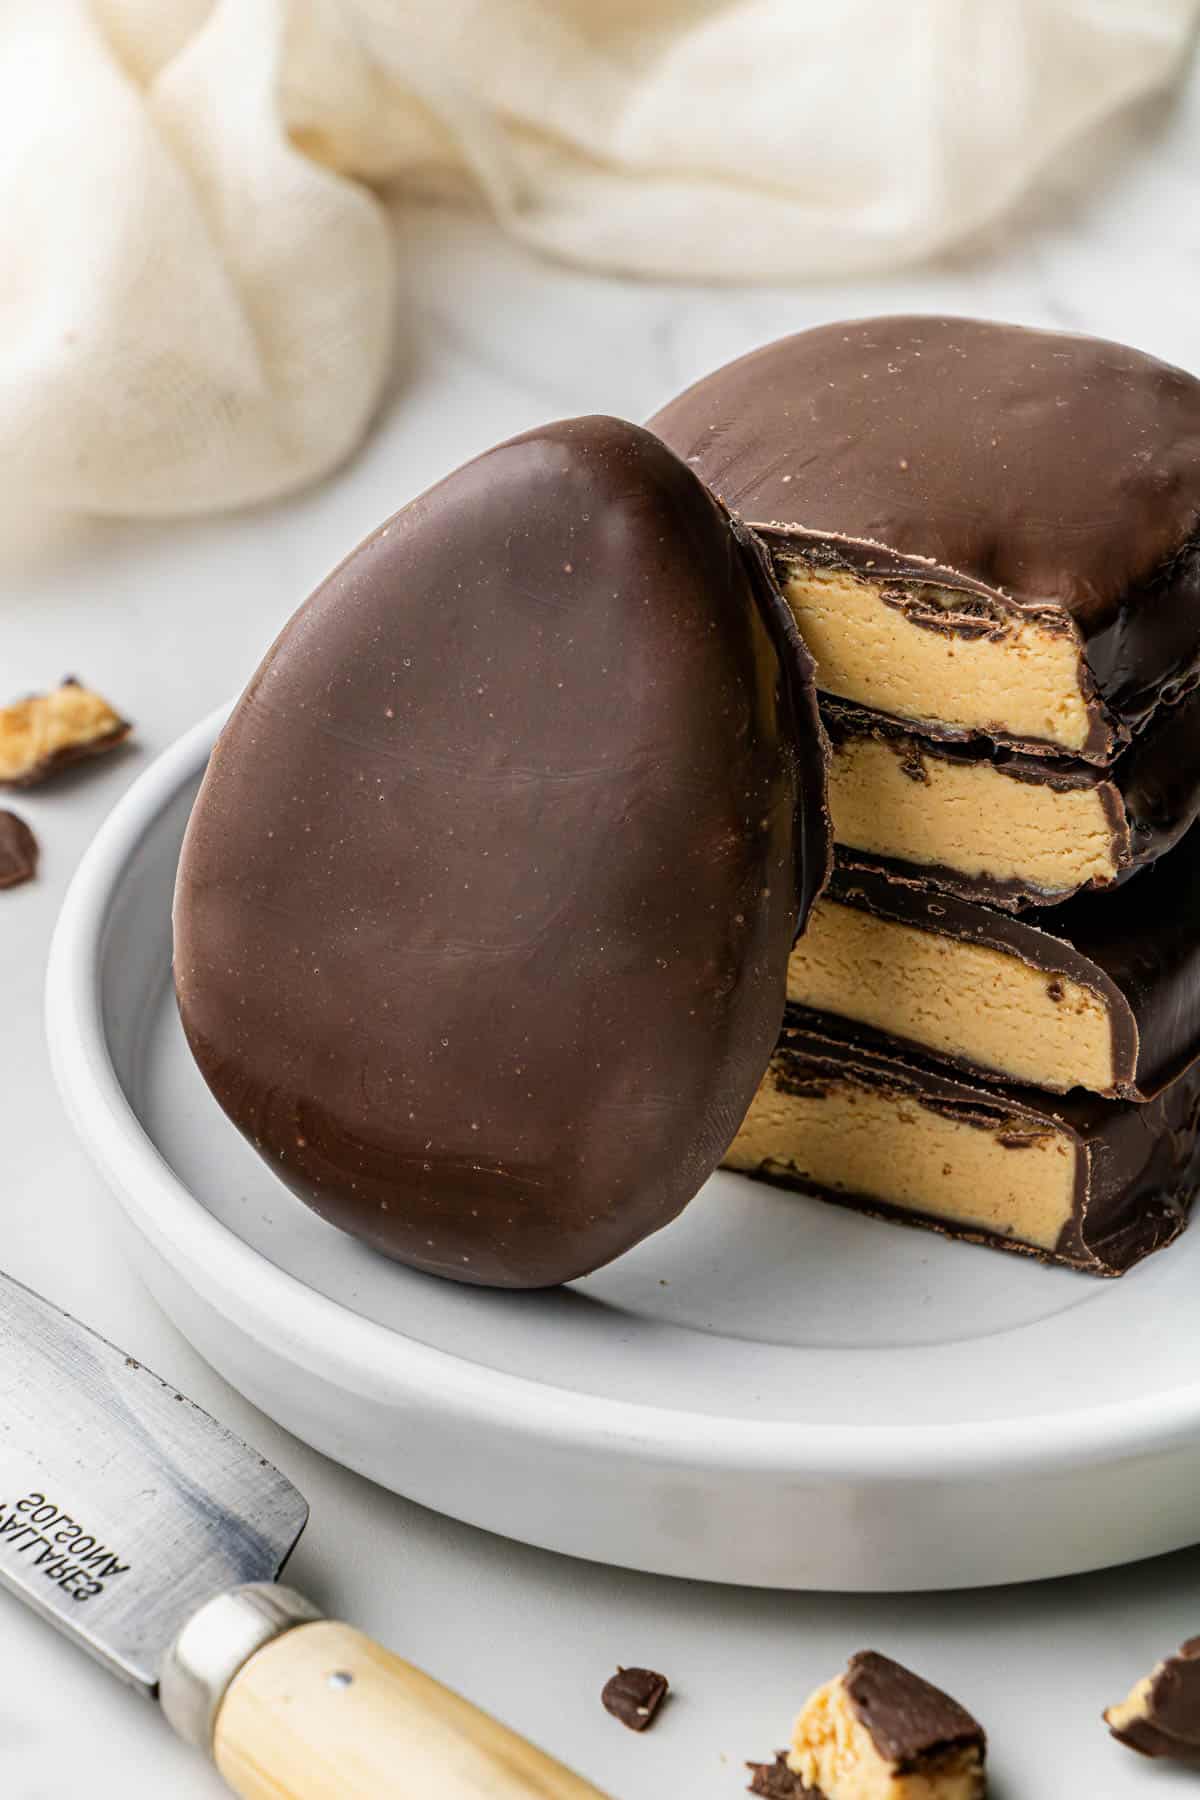
At its core, a Reese's Egg is a masterpiece of culinary simplicity: creamy peanut butter meeting rich chocolate. This homemade rendition elevates that classic pairing by allowing you to control the quality of ingredients, ensuring a fresher, more vibrant flavor profile. You can opt for your favorite brand of peanut butter, choose higher-quality chocolate, and even adjust the sweetness to your liking. The texture of these homemade reeses eggs is incredibly satisfying – that dense, slightly crumbly yet creamy peanut butter interior is perfectly complemented by the snap of the chocolate coating, whether you enjoy them at room temperature or chilled.
Making Memories: A Kid-Friendly Kitchen Adventure
One of the most rewarding aspects of this recipe is its incredible kid-friendliness. While some baking projects can be intimidating for young chefs, making homemade Reese's Eggs is an adventure designed for small hands and eager minds. From mixing the peanut butter dough to rolling it out and cutting shapes, there are plenty of tasks where kids can actively participate and feel a sense of accomplishment. This isn't just about making a treat; it's about creating cherished family memories, teaching basic kitchen skills, and fostering a love for cooking. Imagine the joy on their faces as they proudly present their very own handcrafted Easter eggs!
Gather Your Simple Ingredients for Perfect Homemade Reese's Eggs
The beauty of this recipe lies in its straightforward ingredient list. You likely have most of these pantry staples on hand already, making it an accessible project for any day of the week, not just holidays. Each component plays a vital role in achieving that coveted copycat Reese's flavor and texture.
- Powdered Sugar: This isn't just for sweetness; it's crucial for achieving that characteristic dense, smooth, and slightly crumbly texture of the peanut butter filling. Granulated sugar won't work the same magic, so stick with the powdered variety for best results.
- Creamy Peanut Butter: The star of the show! We recommend creamy peanut butter for that authentic, uniform filling. However, if you're a fan of a little texture, a slight swap to crunchy peanut butter can introduce an interesting twist. Just be mindful that natural peanut butter (the kind that separates) might require a bit more powdered sugar to achieve the desired firm consistency.
- Melted Butter (or Margarine): This binds the peanut butter and sugar together, contributing to the rich flavor and smooth consistency. When melting, ensure it's just barely melted and not scorching hot. Excessively hot butter can "cook" the peanut butter mixture, leading to an oily or inconsistent dough.
- Milk (or Dairy-Free Alternative): A small splash of milk helps bring the crumbly dough together into a cohesive, pliable mass. Whole milk works beautifully, but feel free to substitute with almond milk or another plant-based milk for a dairy-free option without compromising the texture or taste.
- Shortening: This is a secret weapon for melting chocolate! Adding a tablespoon of shortening (like Crisco) to your chocolate chips helps create a smoother, more fluid chocolate coating that's easier to dip with and sets beautifully. It also helps prevent the chocolate from seizing or burning during melting.
- Chocolate Chips or Melting Wafers: For the outer shell, standard semi-sweet chocolate chips are a great choice. You could also experiment with milk chocolate chips for a sweeter profile or dark chocolate for a richer, more intense flavor. Melting wafers or candy melts are also excellent options for their smooth melting properties and ease of use.
Step-by-Step Guide: Crafting Your Delicious Copycat Reese's Eggs with Kids
This recipe is surprisingly simple, designed for success even with enthusiastic little hands at work. Follow these steps, and you'll be enjoying your perfect homemade reeses eggs in no time!
Preparing the Peanut Butter Dough (The Fun Part!)
- Combine the Core Ingredients: In a large mixing bowl, combine the powdered sugar, creamy peanut butter, and melted butter. If you're using a stand mixer, attach the paddle attachment.
- Mix Until Crumbly: Begin mixing these ingredients on low speed. The mixture will initially be quite crumbly, resembling coarse sand. This is completely normal!
- Add Milk Gradually: Now, add the milk (start with about two tablespoons). Continue to beat the mixture. You'll notice the dough slowly coming together, becoming softer and more cohesive. If it still seems too dry or crumbly after a minute or two, add another teaspoon of milk, being careful not to add too much, as this can make the dough sticky. The goal is a firm, pliable dough that holds its shape.
- Kid Involvement: This is a fantastic stage for kids to get involved! They can help measure the powdered sugar (less messy!) or use a sturdy spoon to mix by hand once the ingredients are mostly combined. Older kids might even enjoy kneading the dough briefly once it's softer.
Shaping and Freezing for Perfection
- Roll Out the Dough: Lightly flour a clean work surface or lay down a sheet of parchment paper. Transfer the peanut butter dough to your prepared surface. Using a rolling pin, roll the dough out to an even thickness, about 1/2 inch. You want it substantial enough to hold its shape but not overly thick.
- Cut Your Shapes: For traditional Easter treats, use an egg-shaped cookie cutter. If you don't have one, don't worry! You can freehand shapes with a butter knife or even roll small portions of dough into individual egg-like forms by hand. This is another excellent opportunity for kids to get creative with their cookie cutters or practice their shaping skills.
- Freeze for Firmness: Carefully place the shaped peanut butter eggs onto a cookie sheet lined with parchment paper. Transfer the cookie sheet to the freezer and chill for at least one hour. This freezing step is absolutely crucial. It ensures the peanut butter eggs are firm enough to withstand the warm chocolate dip without falling apart, making the dipping process much easier and cleaner.
The Grand Finale: Melting and Dipping in Chocolate
- Prepare Your Chocolate: When your peanut butter eggs are almost done freezing, it's time to prepare the chocolate coating. In a microwave-safe bowl, combine your chocolate chips (or melting wafers) with one tablespoon of shortening.
- Melt Carefully: Microwave the chocolate mixture in 30-second intervals, stirring thoroughly after each interval. Chocolate can burn quickly, so take your time and stir diligently. Continue until the chocolate is completely smooth and melted, with no lumps remaining. If you need more chocolate for dipping, you can melt a second batch with additional shortening as needed.
- Dip Your Eggs: Remove the frozen peanut butter eggs from the freezer. Using a fork or a dipping tool, carefully submerge each egg into the melted chocolate, ensuring it's fully coated. Gently tap the fork against the side of the bowl to allow any excess chocolate to drip off.
- Set and Enjoy: Place each chocolate-covered egg back onto the parchment-lined cookie sheet. Let them sit at room temperature for a bit to allow the chocolate to set, or pop them in the refrigerator for a quicker set. Once the chocolate is firm, your incredible homemade reeses eggs are ready to enjoy!
Tips, Tricks, and Customizations for Your Homemade Reese's Eggs
While the basic recipe is fantastic, there are endless ways to customize and enhance your homemade Reese's Eggs experience.
Beyond Easter: Creative Shapes and Occasions
Who says peanut butter eggs are just for Easter? This recipe is so versatile! Ditch the egg cookie cutters and try other shapes. Hearts for Valentine's Day, stars for patriotic holidays, or even simple circles for an everyday treat. You can also press the entire batch of peanut butter dough into a square baking dish, chill it, then slice it into bars before coating in chocolate for an effortless peanut butter cup tray.
Dietary Considerations: Gluten-Free & Dairy-Free Options
One of the beautiful aspects of this homemade recipe is its natural compatibility with various dietary needs. For those avoiding gluten, you're in luck! All of the core ingredients—powdered sugar, peanut butter, butter, milk, shortening, and chocolate chips—are typically gluten-free. Always double-check labels, especially for chocolate chips, to ensure no hidden gluten-containing additives. For dairy-free requirements, simple substitutions are readily available: opt for plant-based milk (like almond or oat milk) and use a dairy-free butter alternative. There are also many excellent brands of dairy-free chocolate chips and shortening options on the market, making it simple to create a treat everyone can enjoy.
Storage and Enjoyment
Once your homemade reeses eggs have fully set, you can store them in an airtight container. While they are perfectly delicious at room temperature, many find their flavor and texture truly shine when chilled in the refrigerator. The chocolate becomes firmer, and the peanut butter filling takes on a delightfully dense, almost fudge-like consistency. They typically last for up to a week in the fridge, though it's rare they stick around that long! These also make fantastic edible gifts for friends and family, packaged in a cute box or cello bag.
Making your own copycat Reese's Eggs is a rewarding experience that delivers on taste, fun, and versatility. Whether you're whipping up a batch for a special Easter celebration, looking for a delicious gluten-free treat, or simply craving that irresistible peanut butter and chocolate combination, this recipe is a winner. Gather your ingredients, invite your little helpers, and get ready to create some unforgettable homemade magic!
